As we all know that Microsoft Flow is also known as Power Automate.
So, it has some limitations as well. Like Request limit, Flow limits, etc. to know more about Limits and configuration in Power Automate,, click here.
Another important point about power automate is that it is priced based on the number of times the flow has been triggered.
So, today we will learn how can we restrict/filter our power automate trigger.
Here is the scenario, I have a custom entity(Blog Note) of activity type and I want my power automate to trigger on create of blog note record when it’s is created from the Contact entity.
Now, under the timeline section, I can see an extra activity entity named Blog Note under Account, Contact, Lead, and so on.
I have the power automate ready with me, which triggers whenever a record is created within the Blog Notes entity from any entity like account, contact, lead, and so on.
I want to restrict my flow run so that it triggers only when a user creates the blog notes from the Contact entity. If a blog notes is created from some other entity like account or lead then the flow should not trigger.
To handle this we need to go to the trigger step(Trigger on create of BlogNotes) setting.
Go to – trigger step SettingsAdded the Trigger Condition
This is how we check if the regardingid is a contact entity then only the power automate trigger else it won’t.
Today, we will learn how to check an empty value on a variable under Power Automate.
I had a requirement where I need to push my Lead record data from Dynamics CRM to another application.
To fulfill this requirement, I thought of going with power automate. Which would trigger whenever a record is created under the Lead entity and then push the data to another application.
Here I have a field Due Date which is an optional field on a form. So now it is a user who chooses to enter data or not.
I have a child flow where I need to pass the data of Due Data as well. Below is the JSON schema for Child Flow. We can see that the due date is of string type, therefore if we pass null value it would throw us an error: Invalid type. Expected String but got Null
JSON Schema
To handle this scenario, we can use an empty expression:
Expression: syntax: if (empty(duedate), ”, duedate)
expression used to check field(duedate) was empty:
if (empty(string(triggerOutputs() ? ['body/duedate'])), '', triggerOutputs() ? [' body/duedate'])
How the expression work is it checks whether the field is empty or not, which means if the value is null or empty then it returns true which will pass ” not null. This is accepted as a string. Else, if the field contains a value then it would pass the field value.
Let’s learn how to get option set label, without query to string map table for retrieving the labels.
As, we know that querying to an entity option set field will give us the option set value not the label. So if we want to get the option set label against any value
Note*: we can use an expression to get option set labels.
I have an option set attribute named as Loan type, which is present on Lead entity. Querying on Lead entity, for attribute Loan type. I get the option set value not the label.
Therefore, to get the label against the retrieved value. I went using replace expression:
The expression replaces the option set value with the given label. Example, whenever we get the loan type as ‘43260000’, using the expression I will get the result as “HomeLoan”.
Moving ahead, we can use the set variable step under our flow. Where we can use the expression based on the output we receive for the above steps.
Additionally on top of the above requirement handling process, I went into another scenario where the option set field was coming null. Reason, the field was marked as optional field. So, now its a user choice to enter data for option set field or leave it as null.
So, whenever I was getting the null value for the option set field records, I was getting an error as: Invalid type. Expected String but got Null.
Therefore for handling the null value exception, I went using empty expression:
The above expression helps us in handling null value. When we are passing loan type value to another variable of string type or to a child flow when the expected schema is of type “string”.
Today, let’s learn how to calculate a person’s age using Power Automate.
There are multiple ways to calculate a person’s age. The DOB field which I have is of string type. So, I thought of using Power Automate to achieve this.
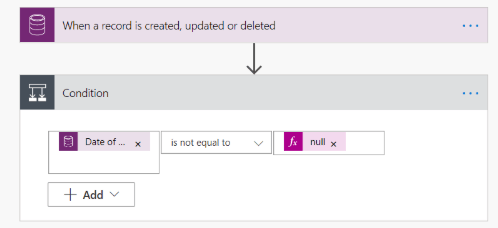
Search for Common Data Service and the trigger should be When a record is created, updated, or deleted as shown in the below image. Next, enter the required details like the environment and the entity name.
Figure 1: Selecting trigger for this flow
Then we will add a condition to our flow, where we will check whether the Date of Birth field is null or not.
Figure 2: Check Date of Birth field is null or not
If the Data of Birth field is not null then we will calculate the age. For that when the condition is met the flow would go under IF yes condition, where we will have to provide the entity name and field under which the calculated age needs to be populated.
Figure 3: Mapping of entity under which the calculated age value to be populated
We will use the above expression for calculating the age. Place the cursor inside the Calculate Age field and paste the above expression under the expression section and click on the Update button.
Figure 4: Using expression for calculating value.
Now, we need to test our flow. Hit the Test button on the right top of your screen.
Figure 5: Test Flow
After a successful run of the flow. We can see age would have been populated under the Calculate Age field under the Contact entity.
Let’s learn about how to fetch data from Cosmos DB using Power Automate and push into Dynamics CRM.
For retrieving the data from Azure Cosmos DB we will need a few details from Azure:
1. URI 2. Primary Key
Figure 1: Azure Key for Cosmos DB connectivity
Let’s jump to Power Automate and start adding the necessary component for achieving this activity.
I have used a manual trigger for reading the data from Azure Cosmos DB and pushing it into Dynamics CRM. Chose an action –> Search for Azure Cosmos DB, then under action select Get all documents.
Figure 2: Creating Flow using Azure Cosmos DB component
We will use the Azure Cosmos DB detail for establishing the connection as shown in the below image. Access Key to your Azure Cosmos DB account here we have to enter Primary Key as shown under Figure 1. Hit Create button.
Figure 3: Establishing connection with Cosmos DBFigure 4: Select the DB and table
Select the desired database under the Database ID and table under the Collection ID field and hit the + New step button.
After the connection has been successfully established. Search for Parse JSON and add Documentsunder the Contentfield. Paste the JSON output under the schema. Hit the + New step button.
Figure 5: Parse JSON as an output
Next, we will search for a control Apply to each.
Figure 6: Add control Apply to each
Under, Select an output from previous steps field pastes the Bodyfrom the Dynamic content and click Add an action button.
Figure 7: Add Body from Dynamic contentFigure 8: Search for Common Data Service(current environment), Action: Create a new record
The above action is needed as it will allow us to map the value coming from JSON to be stored inside Dynamics CRM entity attributes.
Figure 9: Mapping CRM attributes with the output columns.
Now, we need to test our flow with a few more clicks to be performed. Click on the Test button which would appear on the right top of the screen.
Figure 10: Test Flow
Figure 11, Click on Continue and then hit the Done button
The flow will start executing, once the flow has run successfully we will get the below screen.
Figure 12: Flow execution
Now, go into CRM and we will see the records have been created under the expected entity.
Scrolling down the page you will find few sets of services. If the service for which you are looking for is not present in the list, click on See all option. This will navigate you to the page where you can find all the services which are currently present with Microsoft.
Click on the service and select the template.
Figure 2: Choose Service
If the required template is not present. You can create your template from My flows.
Today I am going to create a flow which will send an email notification whenever an account is created in Microsoft Dynamics 365 application.
Figure 3: My Flows tabFigure 4: Create a new blank flow
Clicking on Create form blank option will redirect you to the page where you can find multiple triggers. Choose a trigger to get started with the flow.
Figure 5: Choose the trigger
Select the CRM Organization under Organization Name field. This will populate all the entities respective to the selected organization under Entity name field.
Choose the CRM entity under Entity name. The flow would only trigger whenever a record is created under the selected CRM entity.
Figure 6: Choose the Organization and Entity
Click on add New step button.
Figure 7: Click New Step for adding another Trigger.
I am going to receive email notification on my outlook account therefore I am searching for Outlook, select the mail option Outlook.com
Figure 8: Search Outlook
Now, select Send an email option for sending the notification when an account is created in CRM.
Figure 9: Choose Send an email
Enter the Email address in “To” field which would get the email notification for every Account which gets created in CRM. Enter the Email Subject in the “Subject” field.
Microsoft flow provides you the ability to add the dynamic content by clicking on the Add dynamic content option as shown below:
Figure 10: Add dynamic content
Click on Show advanced options and select Yes under Is HTML field.
Figure 11: Select Show advanced optionFigure 12: Select Yes under Is HTML drop down
Go to mail Body and enter the text as shown in the below image:
<A href> tag is used for specifying a link destination. For now, I have provided the link of CRM Organization. Clicking on the link with navigate you to CRM homepage. <A HREF= ‘https://orgname.crm8.dynamics.com/main.aspx’>Click Here for details</A>
Figure 13: Prepare mail body
Hello Team,
Account AccountName has been created in CRM.
Please verify and approve it.
<A HREF= 'https://orgname.crm8.dynamics.com/main.aspx'>Click Here for details</A>
Regards,
CRM Team
Now
here is a trick for opening CRM record directly from the mail.
Login to CRM, open Account record. Get the Account record URL.
You would get the URL like the below URL which would contain the record GUID.
Microsoft Flow is a cloud-based service which helps to create workflow for automating the business process. These workflows are called as Flows.
Why use Microsoft Flows?
Microsoft Flow not only allows you to get integrated easily with any Microsoft products but also provide the ability to connect with the wide range of different products like Saleforce, Facebook, Twitter, Campfire, Gmail etc and many more.
Microsoft Flow by default come with multiple connectors which helps in creating workflow in very minimal time. It also gives you an ability to go ahead and create your own connectors.
Microsoft Flows can serve in many different ways. Like sending notification, Copying File, Collect Data , Collect Tweets and many more. Flows can be managed easily from desktop or mobile app.
How Microsoft Flowsworks?
For creating a flow, you need to know the trigger event and the set of actions which are required to be performed when the criteria is met.
The most common use of flow is to trigger notification on a specific event. Example: Whenever a Lead or Account is created in CRM then a notification should be sent via text message or email to the sales representative. This could be achieved easily by Microsoft Flows through connectors.
Connectors are basically the API proxy which helps the services to connect with flows.